When bidding on a roofing project you don’t want to propose an estimate that is too low and could undercut your profits. But having an estimate that’s too high can scare off potential clients. So how do you accurately price a roofing job?
The key to producing correct estimates is understanding your overhead costs, working with accurate measurements, and roofing software when necessary. Let’s dig a little deeper, and show the different steps involved when pricing a roofing job.
Factors that affect the cost of a roofing job
While a lot goes into a roof renovation or installation, there are four main factors that determine the underlying price of a project.
Materials
The materials used to replace a roof will make up about 40% of your cost. This is where a contractor or homeowner can significantly affect the total cost of the roof replacement project. We recommend giving a few options so the client can see the variations in price.
While the material they choose will impact the cost of the roof project, it will also impact the roof’s life and the resale value of the home. A client may want to go with a cheaper material to save costs. However, you can urge them to invest in a more expensive material that could lead to higher bids when they choose to sell.
Roof Pitch
There are several measurements you need to make an accurate bid for the roofing project. Accounting for the roof’s ground-level square footage is only part of the measurement calculation. You must also account for the pitch—usually expressed as a ratio. A ratio of 4:13, for example, means the roof rises four feet for every 13 feet of horizontal length.
Before you reach the final step of determining the job’s total squares (100 square feet = one square) you’ll need to know the pitch’s multiplier. This handy chart will help you find the correct number.
| Roof Pitch | Multiplier |
|---|---|
| 3:12 | 1.15 |
| 4:12 | 1.20 |
| 5:12 | 1.24 |
| 6:12 | 1.24 |
| 7:12 | 1.30 |
| 8:12 | 1.35 |
| 9:12 | 1.40 |
| 10:12 | 1.40 |
| 11:12 | 1.55 |
| 12:12 | 1.70 |
Now you’re ready for the final step in calculating the roof’s area—multiplying the ground-level square footage with the pitch ratio multiplier. Here’s an example of what the calculations would look like:
You’re working on a house that is 30 ft. x 60 ft. The entire area is 1,800 square feet (30 x 60). Divide that number by 100 to arrive at 18 ground-level squares. The pitch is 5:12 with a 1.24 multiplier, so you’ll multiply 18 by 1.24 to get 22.32. You’ll round up to account for some waste and voila! The number of squares required for this job is 24. If you went by ground-level area only, you’d produce a bid that only accounts for 18 squares. So you’d be missing six squares (aka 600 square feet) when calculating the material needed.
Labor
You have to pay your employees so considering their cost in the final price is crucial. To do this, first determine how many hours the job will take. Then multiply that by how many workers you’ll have on the job to create the total labor hours.
Second, you’ll want to figure out each employee's hourly labor cost. Always calculate the hourly wage, with taxes, and worker’s compensation. Once you have a total labor cost, you’ll multiply that by the total labor hours for the entire sum of your team’s labor.
Taxes
Forgetting to add taxes to the project’s total could cost your business a lot of money down the road. You can charge the client the taxes on service and roofing material and help yourself from paying taxes on your business profits.
We recommend you hire an accountant to help determine what your taxes should be per job. Although it may be a hassle up front, your future self will be happy you had this sorted out earlier.
Accounting for overhead and profit margins in your roofing price
Including overhead, or extra costs, and giving room for yourself to make a profit helps to prevent surprise costs and keeps you in business. Your overhead costs could include a myriad of different things including uniforms, office rent, insurance, accounting, and different software integrations—it’s essentially anything extra you need to complete the project.
You can simply add overhead costs to the final price, but we recommend showing it as a line item for full transparency. You’ll need to break down the cost into an hourly rate. First, figure out the overhead cost per week and then estimate the weekly labor hours. Then, divide the hours by the overhead costs.
If the overhead cost per week is $800 and the weekly labor hours are 80, then the hourly figure will be $10. This means for every labor hour you need to charge a minimum of $10 to your client to cover your overhead expenses.
The profit you choose to add to the final roofing price depends on your desired profit margin. You don’t want it to be too large and possibly scare off potential clients, but making it too small will eat into your business. Typically roofers add a 6% profit margin to their project’s totals.
How to calculate the cost of a roofing job
Lots of addition! For a total roofing cost that’s ready for a potential client, you’ll need to add up all of your costs. That includes material, labor, taxes, roof pitch/total square footage, and overhead. You then take that total and apply a markup to reach your desired profit margin. And that final sum is the total cost of your roofing job.
Tips for accurately pricing your roofing work
One way to ensure your price’s accuracy is to look up the home’s building codes. There are specific codes that restrict the use of some materials. Going the extra mile to ensure everything is within compliance will make your estimates stand out.
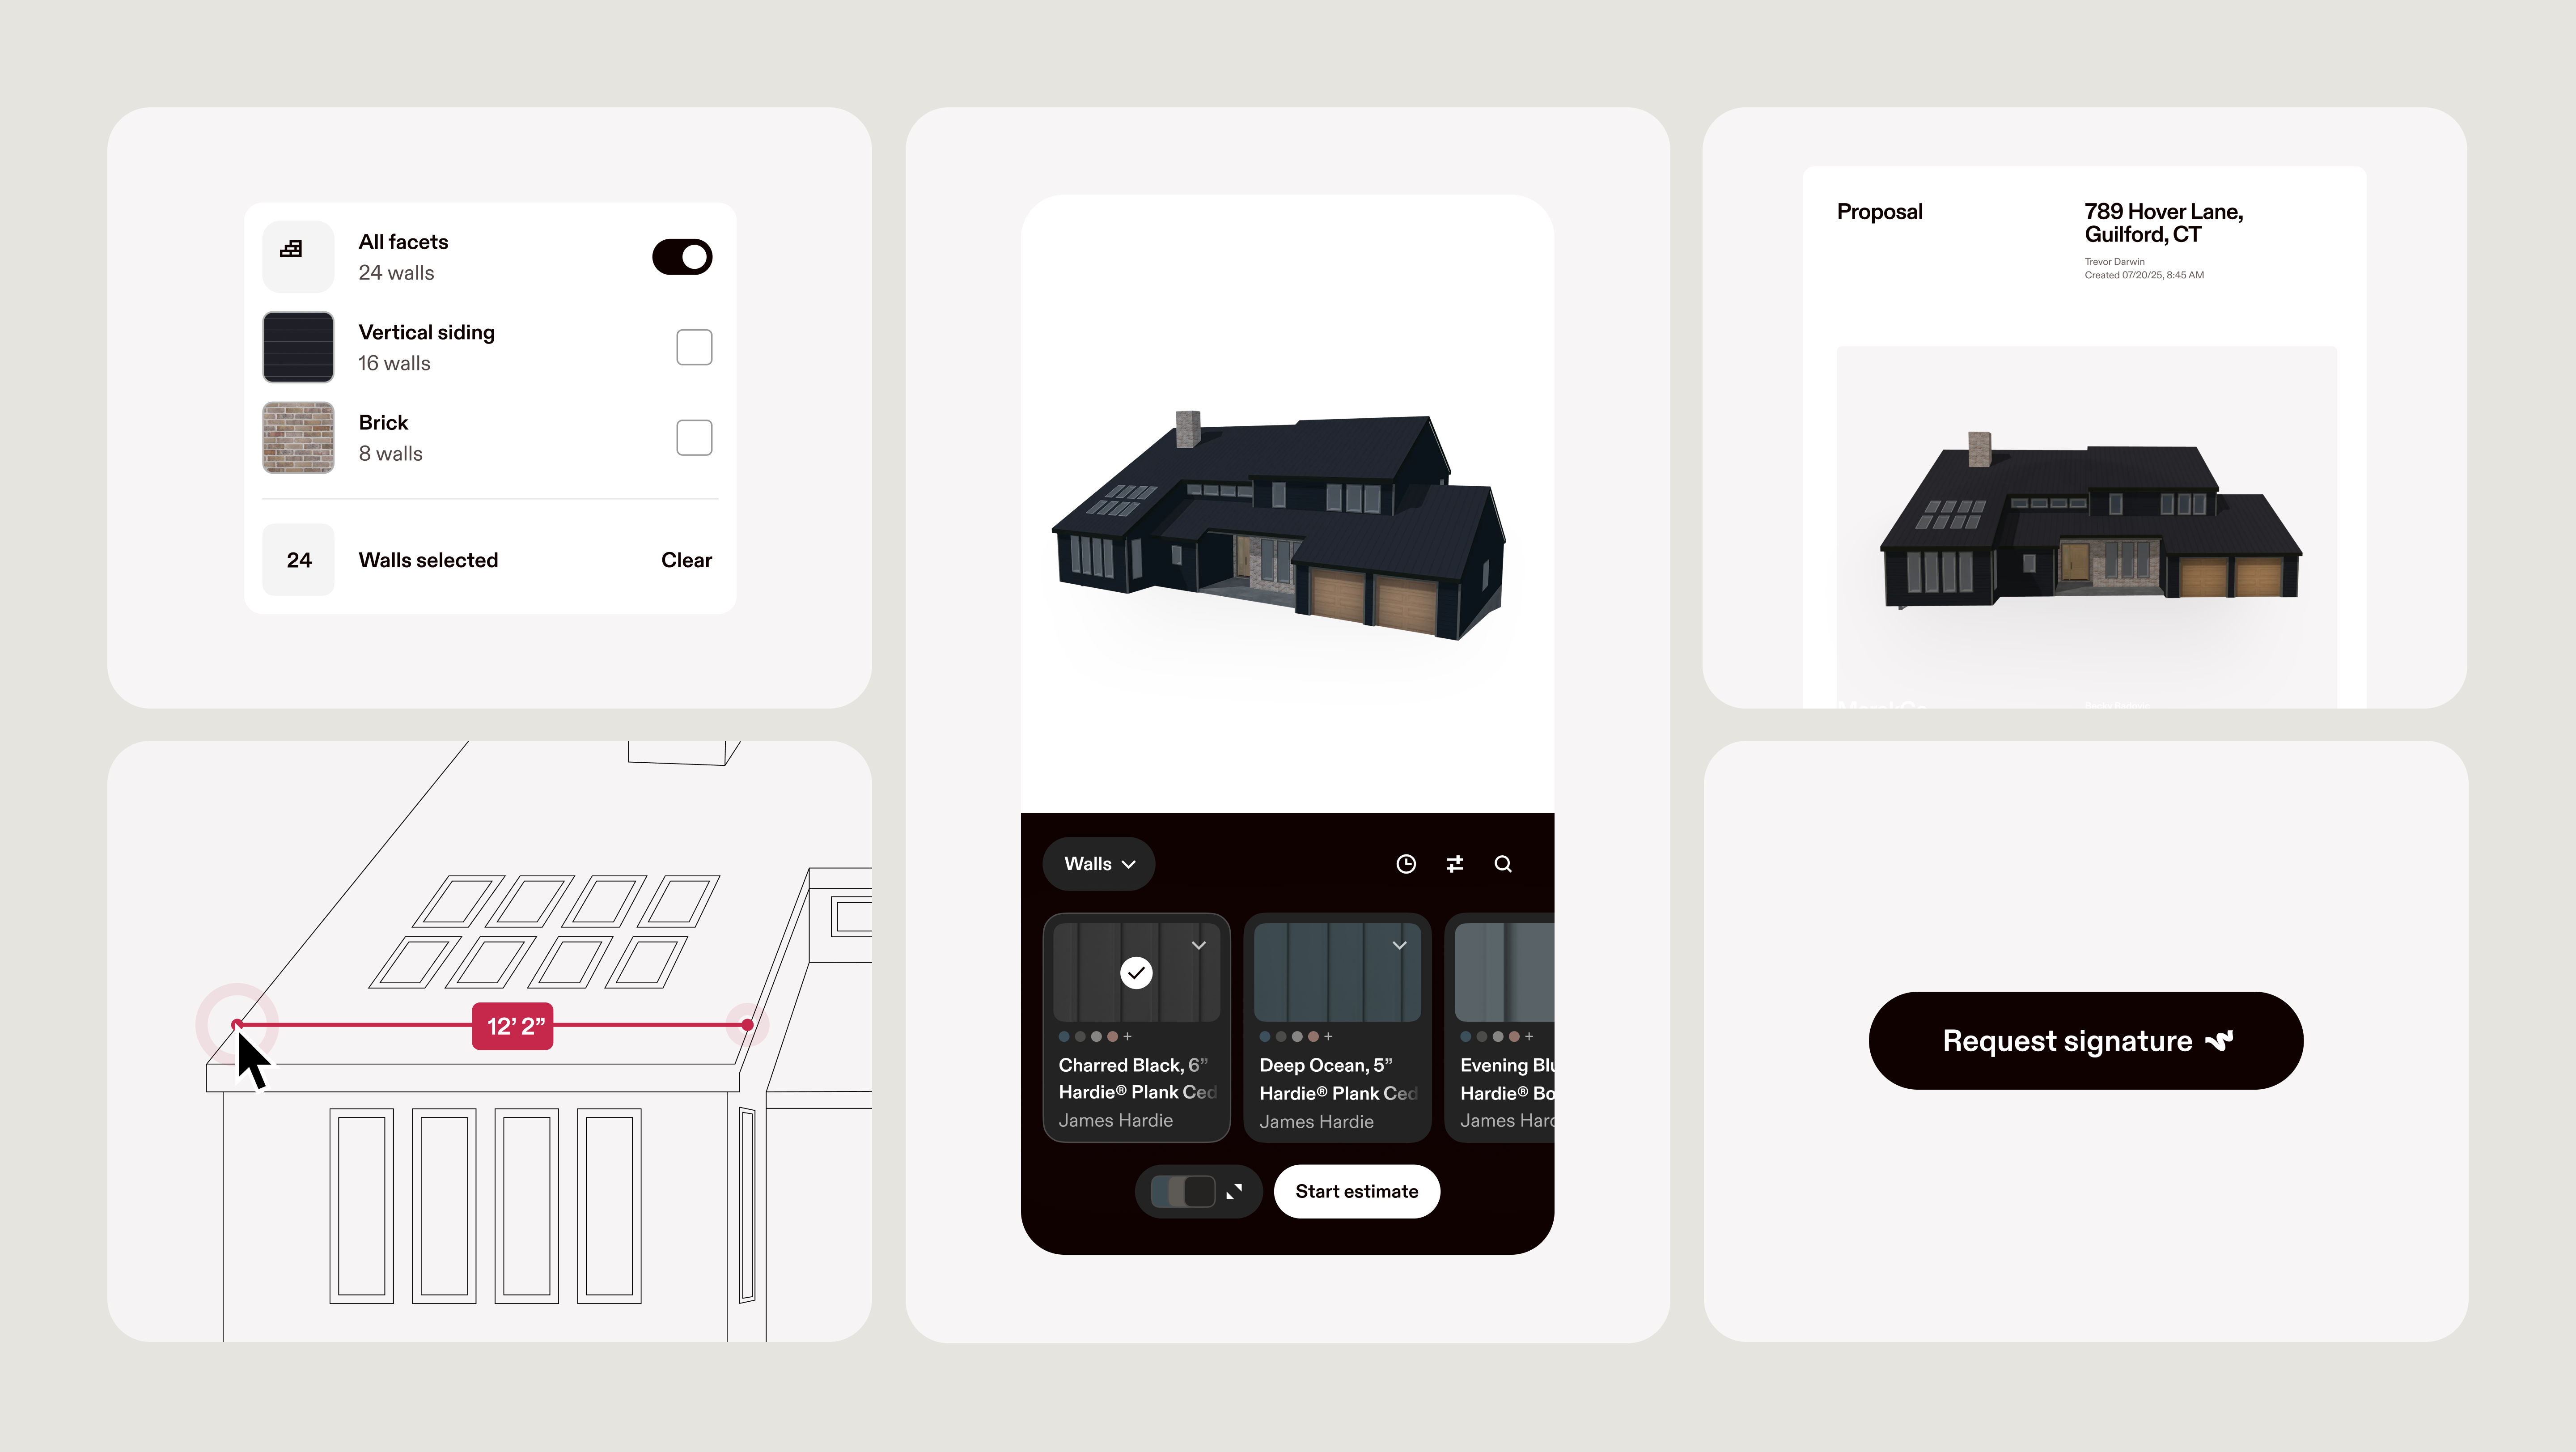
Hover is another way to create a fast and accurate final price. With our app, you gain accurate measurements and 3D visualizations from a few smartphone photos or a blueprint upload. You’ll reduce the time spent on every bid and have an accurate estimate that will make you stand out and bid more efficiently. Plus, when you present your estimate to the customer, you can pair it with a dynamic 3D model of their home to really wow them. Learn more about how Hover can help you measure and price a roof.
Ready to get started? Sign up now and get 1-week of unlimited free measurements!