Wood is a timeless material and a popular exterior siding choice. But it also has a downside, which is that it requires regular maintenance and repair. While caring for your exterior wood siding takes some work, if you maintain it regularly you’ll enjoy this beautiful siding for many years to come.
Here’s what you need to know about exterior wood siding, including how to repair and replace wood siding and how long you can expect your wood siding to last.
How long does wood siding last?
With good maintenance, wood siding will last anywhere from 20-40 years. You should plan to reseal or repaint it every few years, patch holes or cracks as they develop, and replace damaged exterior wood siding before it impacts surrounding areas.
Exterior wood siding can be vulnerable to the elements, including water damage, dry rot, insect infestations, and splitting and bowing as it dries over time. That’s why it’s important to care for your exterior wood siding on a regular basis, protecting it from leaks and moisture that could lead to greater structural damage. To keep it in top condition, plan to treat it about every five years. You should also avoid pressure washing it, which can lead to chipped paint that allows moisture to seep through.
Materials and tools you’ll need
Before you begin any wood siding project, gather the following materials and tools to ensure a smooth repair or replacement process:
Materials
- Replacement wood siding boards
- Paintable exterior-grade caulk (preferably acrylic)
- Exterior primer and paint
- Epoxy wood filler (for holes and cracks)
- Stainless steel nails
Tools
- Utility knife
- Oscillating multi-tool
- Pry bar
- Putty knife
- Sandpaper (medium and fine grit)
- Caulking gun
- Hammer or nail gun
- Gloves
- Safety goggles
Having these on hand will save time and help you work more efficiently, whether you're patching a hole or replacing full boards
How to repair wood siding
It’s important to repair your wood siding as soon as you notice signs of damage. If it is cracked even a little bit, water can seep in, leading to rot and mold.
Fortunately, if the damage is limited to just a few boards, you can repair them easily without having to do a full replacement. Here’s how:
1. Inspect for visible damage
Look for cracks, warping, or signs of water intrusion. Even small cracks can allow moisture to seep in, leading to rot or mold beneath the surface.
2. Identify boards that need replacement
If the issue is limited to one or two boards, you can likely replace them individually instead of removing large sections of siding.
3. Remove the caulk around damaged boards
Use a utility knife to carefully cut through the caulk that joins the damaged board to its neighbors, loosening the connection.
4. Cut vertically with a multi-tool
Use an oscillating multi-tool to make vertical cuts through the board so you can isolate and remove only the damaged portion.
5. Pry the board loose
Use a pry bar to gently remove the loosened board from the wall, being careful not to disturb adjacent boards or surrounding nails.
6. Cut a replacement board
Use the old board as a template to measure and cut a replacement piece that fits the space exactly.
7. Nail the new board in place
Secure the new siding board using stainless steel nails, which won’t rust or corrode over time.
8. Seal the seams
Apply paintable acrylic caulk to the joints between the new board and the existing siding to prevent moisture infiltration.
9. Prime and paint
Finish the job by applying primer and exterior paint to the new board, blending it into the surrounding area for a uniform look
How to patch a hole in wood siding
Sometimes your exterior wood siding only requires a minor repair, like patching a hole or crack. You can use a waterproof exterior wood filler to patch a hole in wood siding.
1. Choose a flexible, waterproof filler
Use an epoxy-based exterior wood filler that will expand and contract with temperature changes, and that won’t shrink or crack after curing.
2. Clean the area
Scrape off any loose paint around the hole and dig out any rotten or soft wood inside the affected area.
3. Sand the surface
Smooth the area using sandpaper to remove splinters and ensure a clean, level surface for the filler to adhere to.
4. Apply the filler
Use gloved hands or a putty knife to press the mixed wood filler into the hole, slightly overfilling it to account for sanding later.
5. Let it harden and sand smooth
Once the filler has cured, sand it down until it’s flush with the surrounding siding and ready for paint or sealing.
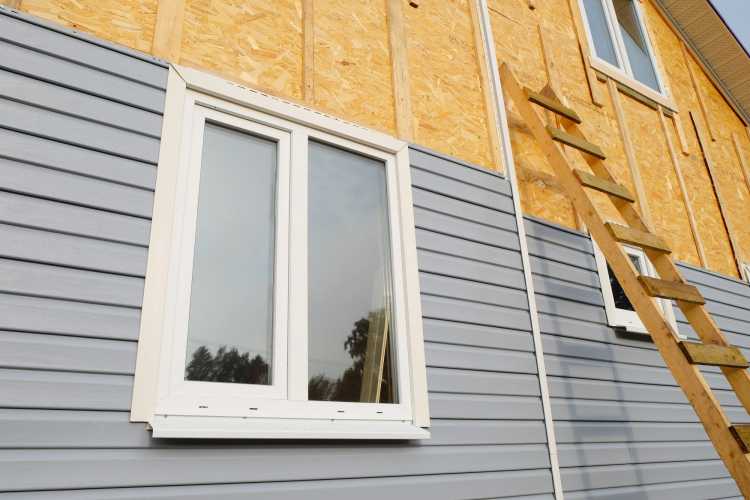
Replacing wood siding: step-by-step
If your wood siding shows signs of extensive damage, warping, or cracking, it may be time for a full replacement. This is especially true if it’s more than a few decades old. But unless you are a home improvement pro, we don’t advise replacing exterior wood siding on your own: contact local contractors and get a quote for a full replacement.
When you do decide to replace your exterior wood siding, you may want to consider alternative materials. For example, if you love the look of wood but not all the maintenance, engineered wood may be a good alternative. It has many of the same qualities as wood siding but can be more durable. For example, it’s more resistant to water damage, mold, warping, and insect infestations. It’s also affordably priced compared to solid wood siding, and should require a bit less maintenance over time.
1. Schedule a professional inspection
Hire a licensed contractor to evaluate the condition of your siding and determine whether spot repairs or a full replacement is needed.
2. Get multiple replacement quotes
Contact several contractors to compare estimates, timelines, and proposed materials before deciding who to work with.
3. Choose your new siding material
While natural wood is beautiful, you may want to consider engineered wood or fiber cement as more durable, lower-maintenance alternatives.
4. Confirm installation timeline
Once you’ve selected your contractor and materials, set a clear schedule for the removal of the old siding and the installation of the new panels.
5. Plan for prep and cleanup
Make arrangements for landscaping protection, noise considerations, and clean-up needs before the project begins.
6. Enjoy your refreshed exterior
Once installed, your new siding will not only boost curb appeal but also offer better insulation and protection from the elements for years to come.
Visualize new siding on your real home with Hover
With Hover Instant Design, you can try new styles on your actual home. It takes seconds to generate endless options in looks you love—or are just discovering. Collaborate with your contractor and easily visualize your exterior home design project with real siding, windows, doors, and roof materials.