Vinyl siding is one of the most popular siding options because it’s durable, easy to install, and relatively inexpensive compared to other siding materials. You don’t have to paint it or do too much when it comes to upkeep. Plus, it works in nearly any type of climate. If you’re looking to add vinyl siding to your home by yourself, here’s a step-by-step guide on how to properly install it for positive results.
Can I Install Vinyl Siding Myself?
Technically, yes! Installing vinyl yourself could save you a lot of money, and you get the pride of doing it yourself. However, hiring a contractor might be the better option, especially if you haven’t installed siding before.
Installing vinyl is an involved process and the way you install it can affect the long-term quality of the siding. Even the highest quality vinyl will buckle and warp if you install it incorrectly. Some siding producers will only offer you a warranty if their product was installed by a professional.
So, although you can save a good chunk of change by installing the siding yourself, there are many tradeoffs to consider before you attempt such a monumental task on your own.
Preparing Your Home for Vinyl Siding Installation
Before you install your new siding you have to take off your old siding. Once your home is stripped bare, check to see if there are any loose or damp boards. Replace those, and scrape away any old caulk from doors and windows.
You’ll also want to clear your work area by removing sconces, downspouts, mailboxes, or house numbering. Finally, tie back any trees or flowers surrounding your house to give you a larger workspace and prevent them from being damaged.
Fitting & Nailing Best Practices
There are a few important rules to follow when fitting and nailing pieces of vinyl siding. The first is, vinyl expands and contracts with warm and cold weather, so it’s important to leave extra room for expansion to prevent the siding from buckling. Leaving a quarter-inch gap between pieces of siding should solve the problem.
You also don’t want to drive nails too tightly. Expanding vinyl could buckle and crack around a too-tight nail. Allow about a sixteenth of an inch between the nail head and the siding. When driving nails, ensure they’re in the center of the appropriate slot and straight, not crooked or at an angle.
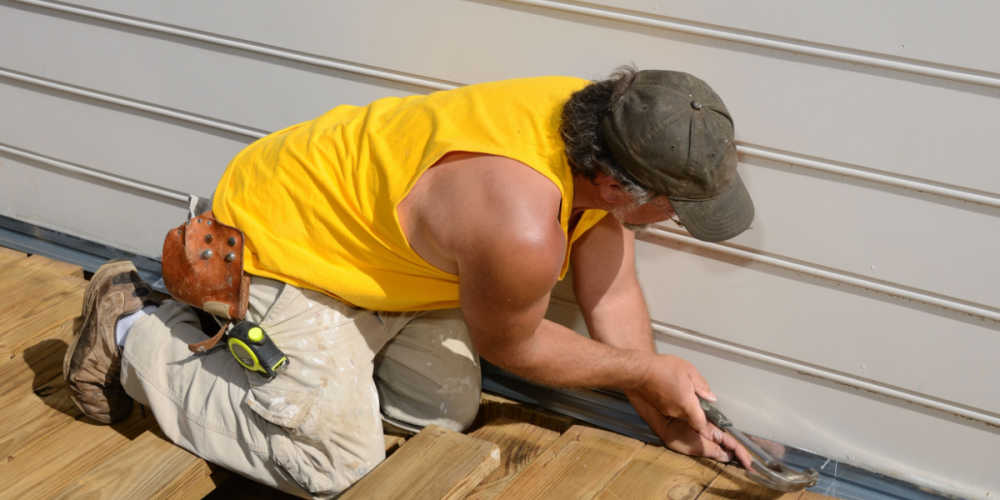
Installing Your Vinyl Siding
Now you’re ready to install your new vinyl siding. It can be broken into two sections—the soffit and fascia areas, and the sides of your home.
Siding the Soffit and Fascia Area
This area of your home’s exterior consists of the roof’s overhang. The soffit is the area that exists between the roof overhang and the side of the house. While the fascia is the exposed horizontal band you see when you look at a roof’s side.
1. Nail J-channel pieces under the fascia
Install lengths of J-channel along the inner edge of the fascia. J-channel hides the cut edges of your siding to produce a clean, finished look.
2. Install J-channel pieces at corners for wrap-around roofs
If you have a soffit that wraps around your home, such as with a hip roof, you need to install the J-channels correctly to account for the change in direction. To do so, you need to nail two J-channels (back to back) diagonally, drawing a line between the corner of the house and the corner of the roof. You will have to cut a number of soffit pieces at an angle to accommodate the diagonal pieces of J-channel.
3. Measure and cut soffit pieces
You want to install soffit pieces perpendicular to your roof’s fascia. Vinyl siding usually comes in 12-foot lengths, so you’ll need to cut these long pieces of siding to fit the measurements of your soffit. Remember to cut them a quarter inch short to allow for expansion in warm weather.
4. Install the soffit pieces
Now it’s time to simply push each panel into the J-channel. You can do this by gently bending the pieces (vinyl is quite flexible) or by pulling (gently!) the channel lip back with a pry bar to get the siding panels to fit.
5. Slide in the fascia siding pieces
Once you’ve installed the soffit pieces, remove your gutter, and slide the pieces onto the fascia. Secure with 4D galvanized or pre-painted nails every few feet or so, but don’t overdo it. When joining fascia pieces in the corners, extend a panel six inches beyond the corner and mark it with a simple line. Use a ruler to ensure a straight line from your mark, then lightly score the fascia siding and fold the piece to create a right angle. Fit the now bent panel onto the corner, making sure to underlay the extra six inches under the preceding panel.
Siding the Walls
With the soffit and fascia areas completed, it’s time to side the walls.
1. Measure your walls
Measure the height of your walls from the eaves (fascia + soffit = eaves) to the bottom of where the previous siding was installed. Divide this number by eight—the width of a piece of siding. If it comes to a whole number, hooray! You can install the siding without having to cut pieces or leave gaps. If it isn’t a whole number, you have to cut the last piece of siding lengthwise to make it fit. Then you’ll have to finish with a J-channel along the top edge rather than a utility trim.
2. Install the starter strip
You install siding from the base of your home moving up along the walls. Determine how far down the wall you want your siding to start and drive a small nail there—this will be a reference point that you can remove later. Then snap a chalk line along the perimeter of your house, making sure it’s level the whole way around. If raising or lowering the starter strip an inch or two means you won’t have to cut the top piece of siding, by all means, do so.
Align the starter strip just below the chalk line and fasten it with nails, remembering to not drive them too tightly into the strip. As you move around your home, leave a quarter-inch gap between strips to allow for movement. You’ll also want to give yourself four inches of space before the corners to leave room for the corner posts.
3. Install the corner posts
First, install half-inch foam sheathing strips on both sides of the corner, then install the corner post on the foam. Make sure the post extends beyond the starter strip by three-quarters of an inch and that it’s running straight up and down. Nail in the corner post starting at the top.
4. Install J-channel around your windows and doors
Add J-channel around all four sides of exterior doors and windows. When adding channels to your windows, always start with the bottom—aka the sill. Measure and cut the channel so it fits the sill exactly. Then cut two lengths of channel for the sides, allowing an extra two inches on each.
At the end of each side J-channel, make a one-inch cut along the outer edge and bend the newly created flap inward to create a drip tab. Slide the tab under the sill channel and install. For the top channel, you want to cut it two inches wider than the window and create drip tabs on both ends.
5. Begin installing the wall siding
Before adding the vinyl siding, you’ll want to add any necessary insulation material first. Then, starting from the bottom, snap each panel into place by hooking the bottom lip of each panel under the starting strip. Secure the panels with a nail every 16 inches, remembering to not fasten too tightly.
6. Overlap adjoining panels
When joining two lengths of siding together, overlap them by one inch. There’s really no “right” way to decide which side to overlap, but we recommend choosing the side that’ll be least visible when looking at the house.
7. Installing siding around your windows
You’re going to create a notch in a panel of siding so it can easily slide into place. First, install siding within one row of the window’s sill. Then measure how wide the notch needs to be, marking the panel with a pencil and leaving a quarter inch on both sides. To measure the height of the needed notch, grab a scrap piece of siding and hold it flush with the wall, and mark the height. Transfer that measurement to the piece of siding. Finally, cut out the notch and install the panel as usual.
8. Install the last row of siding
When you have one row of siding to go, pause, and nail strips of utility trim to the wall, just below the soffit. If you have to cut a panel of siding lengthwise to make the last row fit, you’ll use a snap lock punch tool to make tabs into the cut panel every six inches. Now install that last piece of siding by simply snapping it into place—no nails needed.
Maintenance and Upkeep
What’s great about vinyl siding is that it doesn’t require a lot of upkeep. However, there are a few things you should do at least once a year to keep it looking its best.
Every spring, take an hour and rinse your siding with a garden hose. This simply gets rid of dirt and dust and prevents your siding from looking grimy. When washing your whole home, start at the bottom and work your way up. Then do a quick rinse from top to bottom to prevent streaking. If there is a large stain or smudge, use a gentle soap and soft cloth, or soft bristle brush, to scrub out the dirt.
Taking an account of your siding every spring can also help catch cracks and warped panels before they cause too much damage. The colder temperatures in the winter can cause the vinyl to become brittle. Noticing this damage early means you can replace panels with little cost to you.
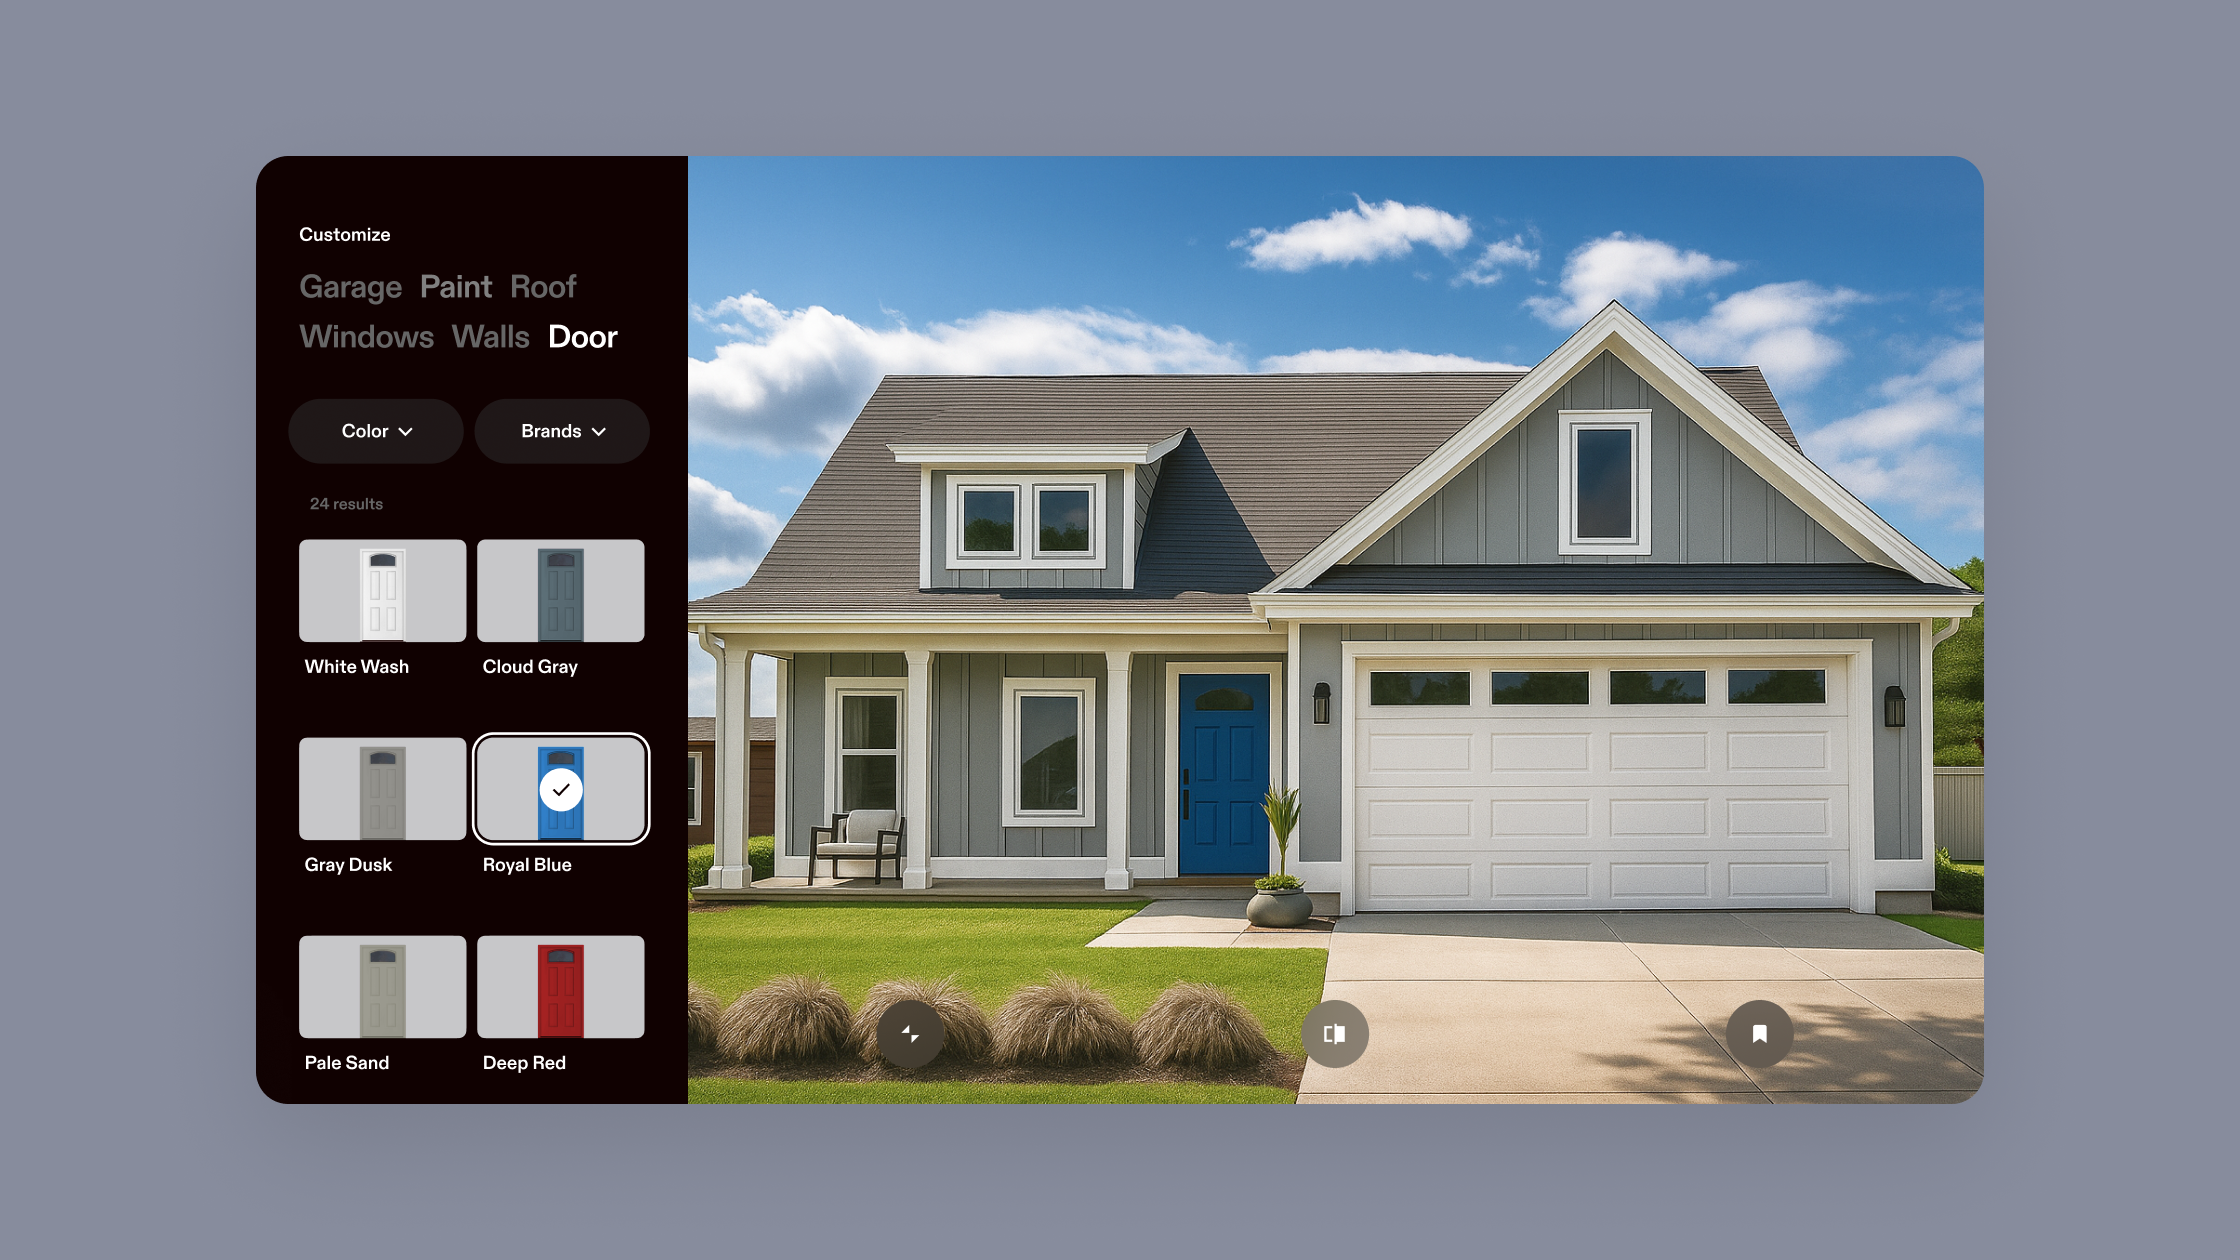
Installing Vinyl Siding with Hover
Siding your house by yourself is a big deal. You should feel prepared for the task and confident that you’re making the right choices for your home. Hover’s technology shows you what your home would look like with new vinyl siding, so you feel confident with your decision.